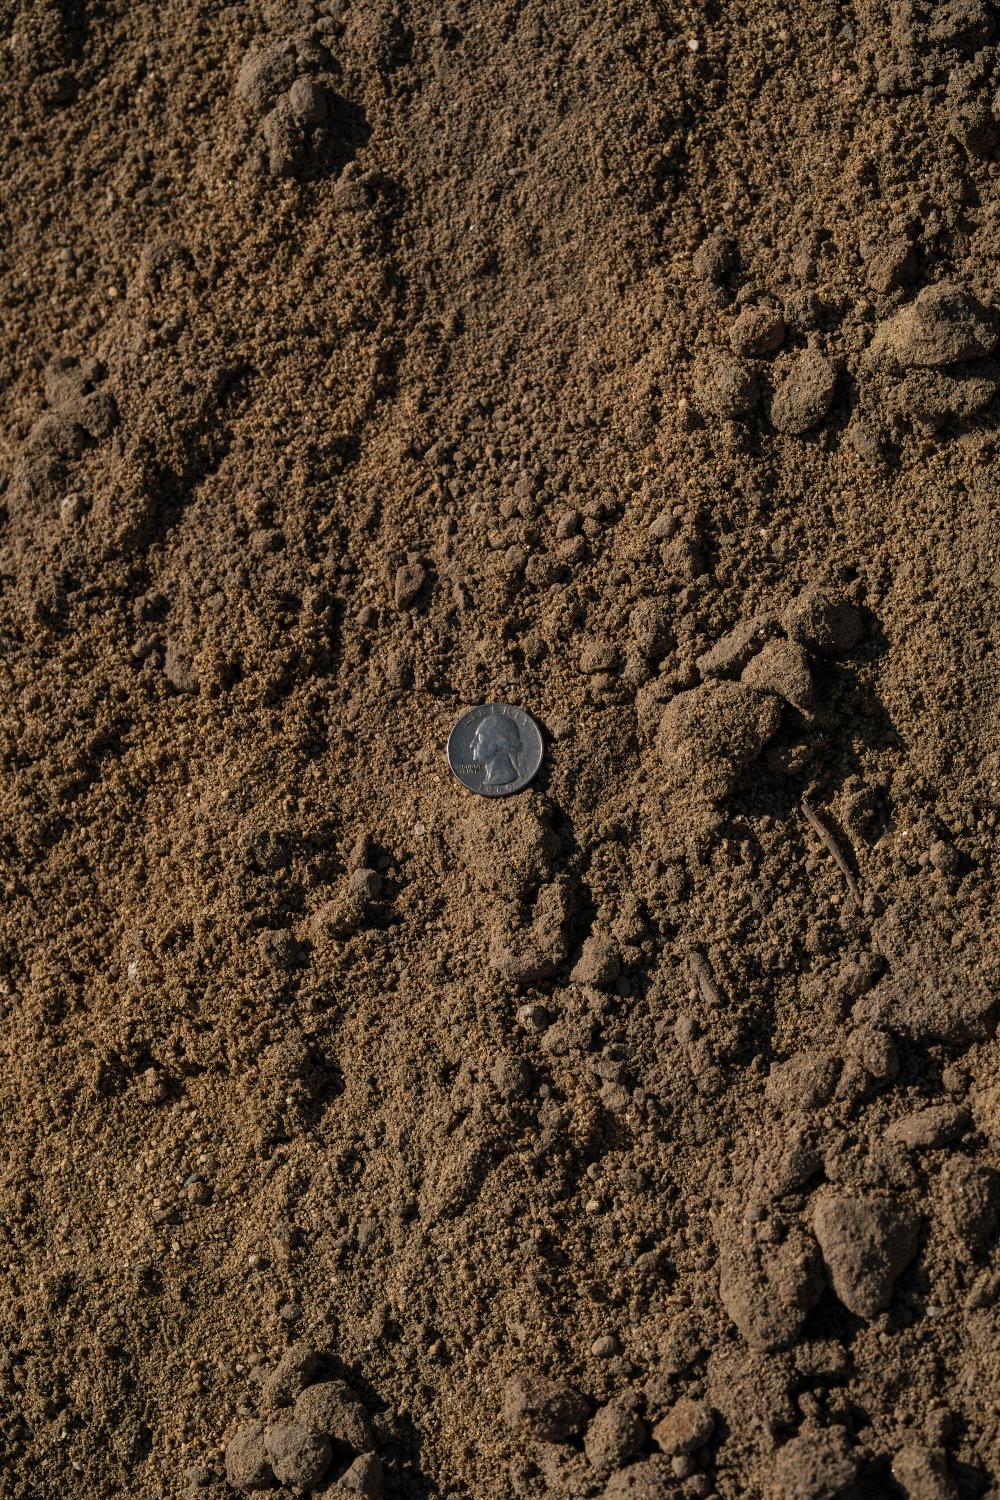
Fill Dirt
90 sqft per ton @ 2″ Depth
Closed
Hours:
Mon-Sat: 6:30 AM - 4:00 PM
Sunday: Closed
Why Fill Dirt? Use Cases and Performance
Fill dirt is unscreened earth sold by the yard for one job: raising or building grade so it stays put once it is compacted. It is not soil in the gardening sense, it has not been screened for rocks, roots, or debris, and it is not meant to grow anything. Customers who ask for "dirt" at the counter usually mean one of three different products, and picking the wrong one is the most expensive mistake in this part of the yard, because fixing it means digging the wrong material back out.
The distinction is simple once you hear it. Fill dirt builds and holds grade. Top soil is the plantable layer you put on top of finished grade. Fill sand is a cleaner, more uniform material used where drainage or a specific compaction behavior matters more than cost. If your project is raise this low spot two feet and then plant grass on it, the order is fill dirt for the bulk of the lift and top soil only for the last few inches where roots will actually sit.
What people use fill dirt for
- Raising low or sunken areas of a yard before grading or planting.
- Filling in after a pool, spa, shed, or old foundation is removed.
- Building pads for sheds, patios, driveways, and other structures before base rock goes down.
- Backfilling trenches around utility lines, foundations, and retaining walls.
- Correcting drainage problems by re-establishing a positive slope away from structures.
- Bulk grade changes on larger lots, hillside cuts, and building sites where volume matters more than screening.
- Filling abandoned wells, septic pits, and other voids that need to be closed off and compacted over.
Why Central Valley properties need it so often
Fresno and Clovis sit on a mix of native clay and older alluvial soils, and grading history on a lot is not always obvious from the surface. Pools get filled in, additions get built and later removed, and irrigation trenches settle years after the original work. On top of that, heavy clay does not drain the way a lighter soil does, so a low spot that would shed water on a sandier lot in another climate sits wet here after every irrigation cycle or winter storm. Fill dirt gives you a way to correct the grade rather than fighting the symptom every season.
Coverage math
Fill dirt runs about 90 sq ft of coverage per ton at 2" deep. At 4" that is roughly 45 sq ft per ton, and at 6" roughly 30 sq ft per ton. Run your own dimensions through our calculators, and bring the numbers when you call 559-233-6603.
Buying fill dirt in Fresno
We sell fill dirt by the ton from our yard at 3562 South Elm Avenue in Fresno, Monday through Saturday, 6:30 AM to 4:00 PM. Load it yourself, have us load your truck or trailer, rent a dump trailer for a self-haul, or have it delivered by dump truck. Fill dirt is heavy and moisture content changes the weight a lot, so call 559-233-6603 before you plan a load around a half-ton pickup.
Fill Dirt: Guidance for Your Situation
Pick the description that fits you best. Specs, steps, and pricing questions differ for a weekend project versus a bid or a compliance inspection.
For homeowners and DIY yard projects
Using Fill Dirt in Your Own Yard
Most homeowner fill dirt projects come down to fixing a low spot, closing a hole left by something that used to be there, or raising an area before a new patio, shed, or path goes in. The material is straightforward to work with, but skipping compaction is the single most common reason people call back a year later asking why the ground sank again.
How much fill dirt do I need?
| Project | Typical depth | Notes |
|---|---|---|
| Filling a shallow low spot in a lawn | 2"-4" | Compact in a single lift if shallow; water settling alone is not enough here. |
| Filling an old pool or spa cavity | Full depth, in lifts | This is the job that most needs professional compaction equipment. Call us before you guess at tonnage. |
| Building a shed or patio pad | 6"-12" of fill under base rock | Fill dirt gets you to rough grade, base rock and gravel finish the pad. |
| Backfilling a utility trench | To grade, in 6" lifts | Compact each lift. An uncompacted trench backfill is the classic case of a sidewalk or driveway settling in a straight line. |
| Raising a bed or planting area before top soil | Bulk of the lift, leaving 4"-6" for top soil on top | Fill dirt is not for planting into. Cap it with top soil before you put anything in the ground. |
| General grade correction on a larger lot | Varies | Get a rough grading plan or at least a target elevation before ordering. Guessing on volume for a whole lot gets expensive fast. |
Step-by-step: filling and compacting a low spot or void
- Clear the area. Remove grass, roots, construction debris, and any buried material that will decompose or collapse later. Fill dirt placed over organic debris settles unevenly as that debris breaks down.
- Check for the actual cause. A low spot that keeps reappearing is sometimes a drainage or irrigation leak problem, not a grading problem. Fixing the leak first saves you from filling the same hole twice.
- Place in lifts, not one big dump. For anything deeper than about 6 inches, place material in layers of 4 to 6 inches and compact each one before adding the next.
- Compact each lift. A hand tamper works for small areas; rent a plate compactor for anything larger than a few square feet or deeper than a few inches. Water the layer lightly before compacting clay-heavy fill, it compacts better slightly damp than bone dry.
- Check your slope as you go. Grade should move water away from your house and structures, roughly a quarter inch of drop per foot as a minimum guideline.
- Cap with the right surface material. If the area gets planted, finish with 4 to 6 inches of top soil, not fill dirt. If it becomes a pad, finish with base rock and your surface material.
- Let it settle before finishing hardscape. Even well-compacted fill can settle slightly over the first season. Waiting through one irrigation cycle or a rain event before pouring concrete or setting pavers on top avoids cracking.
Working with Fresno clay when you fill
Native clay in this area holds water and compacts unevenly if it is too wet or too dry when you work it. If the native ground under your fill is saturated, wait for it to dry before you place new material on top, since fill dropped on soupy clay just sinks into it. If the clay is bone dry and cracked, a light watering before compaction helps it bind rather than crumble. Either way, do not skip compacting the native surface itself before you start adding fill, since a loose, unconsolidated base under your new fill is where future settling comes from.
Do not plant into fill dirt
Fill dirt is not screened and is not intended to support root growth the way top soil is. If the finished area will be lawn, beds, or a garden, always finish the top 4 to 6 inches with top soil rather than trying to plant directly into fill.
How much will it cost and how do I get it home?
Fill dirt is priced by the ton and we quote it live, call 559-233-6603. On logistics, a ton of fill dirt is dense and moisture adds real weight, especially after rain. Most pickups can handle a partial ton safely; for anything close to a full ton or more, either take delivery or rent a dump trailer rated for the load.
Best time of year to do this in Fresno
Fall through early spring is the easier window, since the native clay is more workable when it is not baked hard, and you are not fighting 100 degree heat while you compact in lifts. Mid-summer projects are doable but the ground is harder to break up and dust control matters more. If you are filling ahead of a summer hardscape or planting project, doing the fill and compaction work in cooler months and letting it settle through winter rain gives you a more stable base by the time you build on it.
For contractors, builders, and excavation crews
Bulk Fill Ordering, Compaction, and Job-Site Logistics
Fill dirt on a job site is a compaction problem first and a volume problem second. Getting the tonnage right matters, but getting the compaction right is what keeps a pad, trench, or slope from calling you back after the first wet season.
Ordering and quantities
| Depth placed | Approximate coverage per ton | Typical application |
|---|---|---|
| 2" | ~90 sq ft | Shallow grade correction, minor low spots |
| 4" | ~45 sq ft | Standard lift for pad building or trench backfill |
| 6" | ~30 sq ft | Deeper structural fill lifts |
| 12" | ~15 sq ft | Deep void fill, old pool or foundation cavities, figured in multiple compacted lifts |
Placement and compaction notes
- Strip and proof the subgrade first. Remove organics and any soft, pumping ground before placing fill. Fill placed over an unstable subgrade inherits that instability no matter how well you compact the fill itself.
- Place in controlled lifts. 4 to 6 inch compacted lifts are standard practice for fill dirt. Deep single lifts leave the bottom of the section under-compacted even when the surface tests fine.
- Manage moisture at placement. Clay-heavy fill compacts best near optimum moisture, noticeably damp but not saturated. Bone-dry material will not knit together under a compactor, and oversaturated material shears and pumps instead of compacting.
- Match compaction method to the job. Hand tampers and small plate compactors are fine for landscape-scale work. Vehicle pads, structural fill, and anything under a slab or footing should be compacted to spec with appropriate equipment and, where required, tested.
- Cap structural fill correctly. Fill dirt gets you to subgrade. Base rock, not more fill dirt, belongs above it under pavement, slabs, and driveways.
- Do not use fill dirt as a finish or planting surface. Cap with top soil for planted areas or base rock and a wearing course for hardscape.
Product selection by scope
| Scope | Specify | Why |
|---|---|---|
| Grade raise, pad build, void fill, trench backfill | Fill dirt | Compactable bulk material, most economical way to move volume |
| Where cleaner, more uniform compaction behavior is required | Fill sand | More consistent gradation than native-derived fill dirt, useful around utilities and in tighter specs |
| Finish planting layer over fill | Top soil | Screened and plantable, not a compaction material |
| Structural base under pavement or slabs | 3/4" Blue Base Rock | Engineered aggregate base course, not a substitute for fill dirt in the section below it |
Delivery, staging, and self-haul
- Bulk delivery: dump truck delivery across Fresno, Clovis, and the surrounding Valley, including staged multi-load drops on larger grading jobs.
- Yard loading: we load contractor trucks and trailers at 3562 South Elm Avenue, Mon-Sat 6:30 AM-4:00 PM.
- Self-haul rentals: dump trailers and trucks when your own equipment is tied up on another site.
- Combined loads: fill dirt plus base rock plus top soil on the same run is common on pad and landscape jobs. Tell us the placement sequence and we will order the loads to match it.
- Access and site conditions: flag tight residential access, soft ground, or gated sites when you order so the right truck shows up the first time.
Bulk pricing and accounts
We quote bulk fill dirt and repeat-account pricing directly at 559-233-6603 or through our contact page. Volume, haul distance, and load count all move the number, so we price it live rather than publish a rate that goes stale. For excavation, grading, and production landscape accounts with recurring fill needs, ask about standing pricing so you are not re-quoting every job.
For landscapers and property managers
Fill Dirt for Landscape Regrades and Property Maintenance
On managed properties, fill dirt usually shows up in the same handful of recurring situations: correcting drainage complaints, closing out a removed feature, or prepping a section for a full landscape renovation. The material itself is simple, the part that matters is sequencing it correctly with the soil and hardscape that go on top.
Common property management scenarios
- Drainage complaints in a common area or turf section, usually caused by a low spot that has been getting worse for seasons rather than a single event.
- Removing a dead tree stump and root ball, then filling the resulting depression before it becomes a tripping hazard or mower obstacle.
- Filling in after removing a play structure, shed, or old irrigation feature that leaves a footprint lower than the surrounding grade.
- Regrading a section of a property ahead of a turf renovation or new planting install, where the existing grade has settled unevenly over years of use.
- Correcting settling around utility trenches from prior irrigation or electrical work that was not compacted properly the first time.
Sequencing a regrade correctly
| Step | Material | Purpose |
|---|---|---|
| 1. Strip and remove | N/A, haul off spoils | Clear organics, old debris, and any material you do not want trapped under the fill |
| 2. Bulk fill to rough grade | Fill dirt, compacted in lifts | Restore volume and elevation economically |
| 3. Finish planting layer | Top soil, 4"-6" | Give turf or plant roots a screened, workable layer to establish in |
| 4. Surface finish | Sod, seed, bark, or decorative rock depending on the area | Complete the visible finish |
Managing tenant and HOA expectations
Regrade work looks unfinished for a period between the fill going in and the surface finish going down, and that gap is where most resident complaints come in. Setting expectations up front, with a rough timeline and a note about why the area is temporarily bare dirt, heads off a lot of calls to the office. Where the area needs to be usable quickly, sod re-establishes faster than seed, though it costs more, and it is worth discussing that trade-off with the client before work starts rather than after.
Ordering for multi-site or recurring work
If you manage multiple properties or run recurring maintenance contracts, fill dirt needs come up unpredictably, a sunken irrigation trench here, a removed feature there, rather than on a predictable schedule. Keeping a standing relationship with the yard means you can call in a smaller load on short notice instead of over-ordering to avoid a second trip. Call 559-233-6603 or reach out through our contact page to set up account terms, and see our contractor page for how repeat pricing and staged deliveries work across multiple sites.
Fill Dirt vs. Top Soil vs. Fill Sand vs. Base Rock
This is the comparison that prevents the most expensive mistakes, since all four of these materials get called "dirt" or "fill" in casual conversation and none of them are interchangeable.
| Product | What it is | Use it for | Do not use it for |
|---|---|---|---|
| Fill Dirt | Unscreened, compactable earth | Raising grade, filling voids, trench and pad backfill | Anything you intend to plant into |
| Top Soil | Screened, plantable soil | Lawns, beds, and the finish layer over structural fill | Structural fill or compacted grade beneath pavement |
| Fill Sand | Cleaner, more uniform granular fill | Utility bedding, tighter compaction specs, drainage-sensitive fill | Planting layers or decorative use |
| 3/4" Blue Base Rock | Engineered aggregate base course | Structural base under slabs, pavers, and driveways | Bulk volume fill where an aggregate base is not required |
Fill dirt vs. top soil, the mistake that costs the most
Fill dirt is cheaper by the ton than top soil, which is exactly why people are tempted to use it everywhere, including under a new lawn. It will not perform as a planting medium, since it is not screened, often contains clay clumps and debris, and compacts into a dense layer that resists root penetration. If you have already ordered fill dirt for what turns out to be a planting area, the fix is capping it with 4 to 6 inches of top soil rather than starting over, but it is cheaper to order the right split from the beginning.
Fill dirt vs. fill sand
Both are structural fill materials rather than planting media, and the choice between them usually comes down to spec requirements and drainage. Fill sand is more uniform and drains more predictably, which matters around utility lines and in situations with tighter compaction tolerances. Fill dirt is generally the more economical bulk option for large-volume grade changes where a tight gradation spec is not in play. If a project spec calls out one by name, use that one rather than substituting based on price alone.
Fill dirt vs. base rock
Fill dirt and base rock solve different layers of the same problem. Fill dirt gets you from your current grade up to rough subgrade economically. Base rock is the engineered layer that goes on top of that subgrade under pavement, slabs, and driveways to carry load and resist rutting. Skipping base rock and running fill dirt all the way to finish grade under a driveway is a common way to end up with a surface that ruts and pumps under vehicle weight.
Fill Dirt in Central Valley Conditions
Fresno's clay-heavy native soil, long dry summers, and short, sometimes intense wet season all affect how fill dirt behaves once it is in the ground. Generic fill advice written for a different soil type or climate can send you in the wrong direction here.
Clay and compaction
Much of the Central Valley sits on native clay that shrinks when it dries and swells when it gets wet. That movement is exactly why compaction in proper lifts matters more here than in a sandier region. A poorly compacted fill section over expansive clay will move with the seasons, showing up as cracks, dips, or a surface that seems to heave slightly after winter rain. Compacting in thin lifts near optimum moisture is the most reliable way to minimize that seasonal movement.
Summer heat and dry ground
Fresno regularly sees stretches of 100 degree plus days from June through September. Native clay bakes hard and cracks in that heat, and fill dirt placed on top of unbroken, sun-baked ground does not bond well to the surface below it. Breaking up and lightly wetting the subgrade before placing fill, even in summer, gives you a better bond between the new material and what is underneath.
Winter rain and drainage
The wet season here is short but can deliver several inches of rain in concentrated storms. A fill section that was not graded to shed water, or one that was compacted unevenly, tends to reveal its weak points during the first real winter storm rather than gradually. Getting the slope right at the time of placement, roughly a quarter inch of fall per foot minimum away from structures, matters more here than in a climate with steady light rain spread across the year.
Tule fog and slow drying
Winter tule fog keeps humidity up and slows evaporation for days at a stretch, which means fill placed or backfilled during foggy stretches can stay damp longer than expected. That is not a problem for compaction, damp clay compacts better than dry clay, but it does mean you should expect a longer window before the surface is dry enough to finish with base rock or hardscape on top.
Wind and dust
Valley wind events pick up dry, exposed fill and native soil quickly, which is a dust and neighbor-complaint issue on larger open sites more than a performance issue for the fill itself. Keeping exposed fill lightly watered during placement and covering or seeding it once grading is complete cuts down on dust significantly, and it is a good habit on any site left open for more than a few days.
Irrigation and settling
Fill dirt placed near irrigation lines or under areas that get regular watering will see more moisture cycling than fill in a dry back corner of a lot. That extra moisture exposure is another reason compaction in proper lifts matters, since a well-compacted section handles repeated wetting and drying far better than a loosely dumped one, which will keep settling every time it gets wet until it finally reaches a stable density on its own.
Frequently Asked Questions
Have questions? We've got answers. If you don't see your question below, give us a call at (559) 233-6603.